
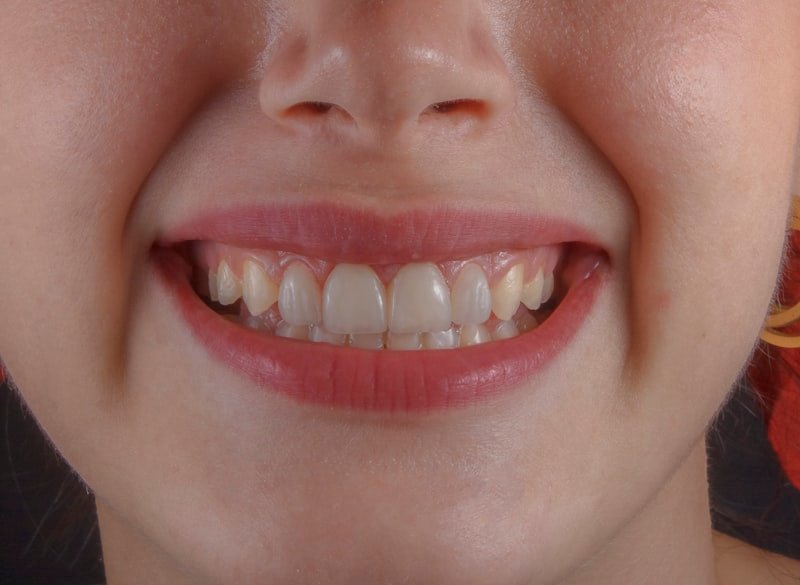
The Turkey teeth procedure at a glance
The procedure has ten stages, and the order matters more than the speed. Each step gives you or the dentist a chance to check something before the next, less reversible, step happens.
- Photos and X-rays sent from home
- A preliminary plan and an estimate of days
- Arrival in Istanbul
- Examination, X-rays and the written plan
- Mock-up of the new smile
- Preparation of the teeth and temporaries
- Laboratory days
- Try-in
- Final fitting and bite check
- Review and aftercare
Not every case uses every stage in the same way. Bonding may be finished in one sitting, and implant cases add surgery and a healing period. The sections below explain what happens at each stage and what you should look for. If you mainly want to know how long to book, our guide to how long to stay in Turkey for dental work focuses on that.
Steps 1 and 2: photos from home and a preliminary plan
The process starts before you travel, with photos and any X-rays you already have. On WhatsApp you send clear pictures of your smile and teeth; a dentist reviews them and replies with a preliminary plan and the expected number of days.
Photos that help most:
- a natural smile, face on, in daylight;
- teeth together, lips pulled back, from the front and from each side;
- the upper and lower teeth from above and below, if you can manage it with a mirror;
- any recent X-ray, especially a full-mouth (panoramic) one.
Tell the dentist what bothers you about your teeth, any medical conditions and medicines, whether you grind your teeth, and whether you have had gum problems. A preliminary plan is exactly that: it can change once the teeth are examined and X-rayed in person, because photos do not show decay under fillings, bone levels or gum pockets.
Steps 3 and 4: arrival, examination and the written plan
Most people arrive the day before their first appointment, or on the morning of it if their flight is early. Airport transfer and help arranging accommodation are available for international patients, and the team at the clinic speaks English. The clinic is in Zeytinburnu, on the European side of Istanbul; practical details are on our how to get here page.
It is worth keeping the first evening quiet. Travel is tiring, and you will make better decisions about your teeth after a night's sleep.
Step 4: examination, X-rays and the written plan
The examination is where the real plan is made. The dentist checks each tooth, the gums, the bite and the jaw joints, and takes the X-rays needed, usually a panoramic X-ray and sometimes a 3D scan for implant cases. Gum pockets may be measured, and old fillings and crowns are checked for leaks or decay.
After the examination you receive a written plan that lists each tooth with its treatment, the material, the number of days and the cost. Any problems found, such as gum disease, decay or a tooth that needs root canal treatment, are treated before cosmetic work begins. Gum disease in particular can change the timeline, because the gums need to settle before final impressions or scans are taken. If something in the plan is unclear, ask; our article on Turkey teeth vs veneers explains how to read a plan line by line.
Step 5: the mock-up
A mock-up lets you see the planned shape of your new teeth before any tooth is prepared. It can be digital, a design shown on screen from your photos and scans, or physical, where tooth-coloured temporary material is placed over your own teeth using a mould of the planned design. A physical mock-up is especially useful, because you can see it in a mirror, smile, talk and judge it in natural light.
This is the right time to speak up about length, width, shape and shade. It is much easier to change a design at this stage than after preparation. Ask yourself whether the teeth suit your face, whether they look natural next to your lower teeth, and whether the shade is a little brighter than your own teeth or very much brighter. Very white shades can look artificial, particularly in daylight.
Step 6: preparing the teeth and fitting temporaries
Preparation is the step that cannot be undone, which is why it comes after the plan and the mock-up are agreed. Under local anaesthetic, the dentist removes the planned amount of enamel: a thin layer at the front for most veneers, more all round for crowns. Many dentists prepare through the mock-up to make sure no more tooth is removed than the design needs.
The prepared teeth are then scanned digitally or recorded with impressions, and the shade is checked and photographed for the laboratory. Before you leave, temporary teeth are fitted. Temporaries protect the prepared teeth and let you live with the new shape for a few days. They are not as strong as the final work, so eat carefully and avoid hard or sticky food while you wear them.
Step 7: laboratory days
For most veneer and crown cases, the laboratory needs several days to design, mill or press, stain and glaze the restorations. These are usually your quietest days: you may have no appointment at all, or a short visit for a check of the temporaries or the gums.
Use them gently. Light sightseeing is fine for most people, but avoid long hot baths or saunas, heavy alcohol and very hard food while temporaries are in place. If a temporary comes loose or feels sharp, contact the clinic; it is a quick fix and better done straight away.
Steps 8 and 9: try-in and final fitting
At the try-in, the finished crowns or veneers are placed on your teeth without being permanently fixed, so you and the dentist can check them. The dentist checks the fit at the gum edge, the contacts between teeth and the shade. You check the look in a mirror and, ideally, in daylight. If something is not right, this is the moment to say so; restorations can go back to the laboratory for adjustment. Allowing a spare day in your trip makes this possible without pressure.
At the fitting, each restoration is bonded or cemented in place. Excess cement is cleaned away carefully from the gum edge, because leftover cement can irritate the gum. Then the bite is checked in all directions: closing, sliding forwards and sliding side to side. High spots are adjusted and polished. A well-adjusted bite is one of the most important factors in how long the work lasts.
Step 10: review and aftercare
A short review a day or two after fitting lets the dentist check the gums and the bite once the anaesthetic has fully worn off and you have been eating normally. If you grind your teeth, this is when a night guard is usually made. Before you go home, ask for copies of your plan and X-rays and a note of the materials used, so your local dentist has a full record. Our aftercare guide covers the weeks that follow.
How many days for each treatment?
The number of days depends on the treatment and on what the examination finds. Typical ranges in Istanbul:
| Treatment | Typical time in Istanbul | Stages that take the time |
|---|---|---|
| Porcelain or E.max veneers | 5–7 days | Mock-up, preparation, lab days, try-in, fitting |
| Zirconia or E.max crowns | 5–10 days | As veneers, plus any root canal or fillings first |
| Composite bonding | Often one session per tooth | Built directly on the teeth, no laboratory |
| Dental implants | Two trips, 3–6 months apart in most cases | Surgery, healing in the bone, then the final teeth |
| Full-arch implants | Decided after assessment | Surgery, often temporary teeth, then final teeth after healing |
These are ranges, not promises. Gum treatment, extractions, root canal work or a remake at the try-in can add days. For implants, the healing period is usually needed before the final teeth unless the bone and gum conditions allow immediate loading, which your dentist decides after examination and X-rays. See our dental implants page for more on that.
Frequently asked questions
What is the Turkey teeth procedure?
Does the Turkey teeth procedure hurt?
How long does the Turkey teeth procedure take?
What happens on the first day at the clinic?
What is a mock-up and do I need one?
Can I go sightseeing during my treatment?
What if I do not like my teeth at the try-in?
This page gives general information and is not a substitute for an examination. Whether a treatment is suitable for you, and how long it takes, is decided after your dentist has examined you and reviewed your X-rays.